Time needed: About 5 minutes
What this does
When enabled, BridgeSync automatically generates a PDF invoice and attaches it to the WooCommerce emails you select. The PDF is created just before the email is sent, ensuring customers always receive up-to-date documents.
Configure email attachments
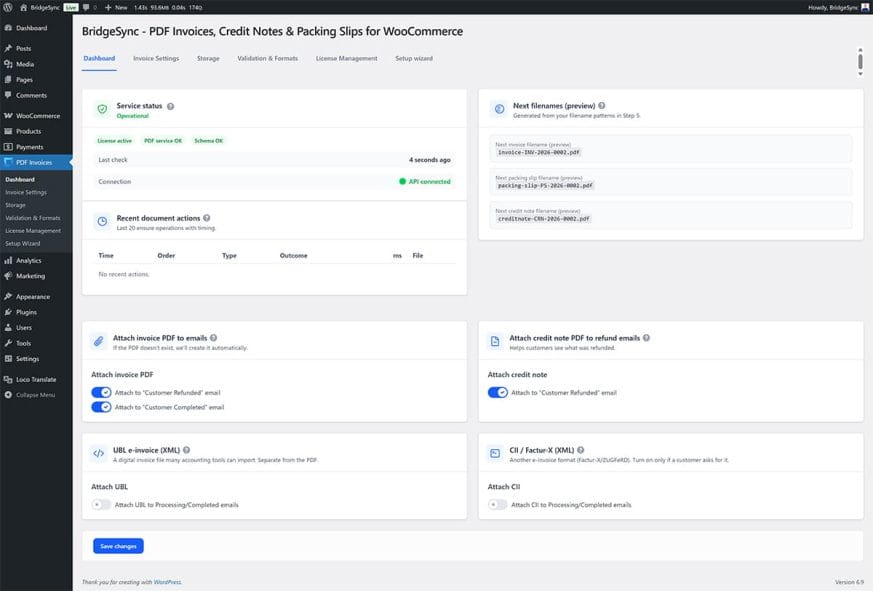
Email attachment settings are located on the Dashboard, not in a separate settings page.
- Go to PDF Invoices → Dashboard in your WordPress sidebar
- Scroll down to the Attach invoice PDF to emails section
- Enable the toggles for the emails where you want invoices attached:
- Attach to "Customer Refunded" email — Invoice included with refund notifications
- Attach to "Customer Completed" email — Invoice included when order is marked complete
- If you issue refunds, scroll to the Attach credit note PDF to refund emails section
- Enable Attach to "Customer Refunded" email for credit notes
- Click Save changes at the bottom of the page
Which email should I use?
| Your workflow | Recommended email | Why |
|---|---|---|
| Ship physical products | Customer Completed | Invoice arrives when order ships |
| Digital products | Customer Completed | Invoice arrives immediately after purchase |
| Subscription renewals | Customer Completed | Invoice arrives with each renewal |
| Manual invoicing | None (generate manually) | Download and send invoices yourself |
E-invoices for B2B customers
If your business customers or their accountants request machine-readable invoices, you can also attach UBL or CII XML files. See E-invoices (UBL & CII) for complete setup instructions.
- On the PDF Invoices → Dashboard, find the UBL e-invoice (XML) section
- Enable Attach UBL to Processing/Completed emails
- For Factur-X/ZUGFeRD format, find the CII / Factur-X (XML) section
- Enable Attach CII to Processing/Completed emails
- Click Save changes
Verify it works
- Create a test order (or pick an existing one)
- Change the order status to trigger the email you configured (e.g., "Completed")
- Check your email inbox — the invoice PDF should be attached
- Open the PDF and verify your logo, colours, and company details appear correctly
Verify
Success: The invoice PDF is attached to the customer email, shows your branding, and contains correct order information.
Invoice not attached?
If the PDF isn't attached to emails:
- Verify the toggle is enabled for the correct email type on the Dashboard
- Check that WooCommerce emails are working (test other emails)
- See Not attached to email for more troubleshooting steps